

Testing a portable drone jammer is a crucial process to ensure its effectiveness, reliability, and safety. As a supplier of portable drone jammers, I understand the importance of comprehensive testing to meet the diverse needs of our customers. In this blog, I will share some key steps and considerations for testing a portable drone jammer.
Pre - testing Preparations
Before starting the actual testing, several preparatory steps are necessary. First, we need to understand the technical specifications of the drone jammer. This includes the frequency bands it can jam, the output power, the jamming range, and the power consumption. For example, most modern drone jammers can jam frequencies such as 2.4GHz, 5.8GHz, which are commonly used for drone communication and control.
We also need to gather a variety of drones for testing. Different drones have different communication protocols and frequencies. By using a diverse range of drones, we can ensure that the jammer can effectively disrupt the operation of various models. It is advisable to have drones from different manufacturers and with different features, such as quadcopters, hexacopters, and fixed - wing drones.
Another important aspect of pre - testing is to select a suitable testing environment. The testing area should be large enough to allow the drones to fly safely within a certain range. It should also be away from populated areas, sensitive facilities, and other sources of interference. A rural or remote area is often a good choice. Additionally, we need to obtain any necessary permissions or approvals for testing in the selected area.
Initial Functionality Checks
Once the preparations are complete, we start with the initial functionality checks. This involves powering on the drone jammer and checking its basic functions. We need to ensure that all the indicators on the jammer are working properly. For example, the power indicator should show that the jammer is receiving power, and the frequency band indicators should accurately display the bands that are being jammed.
We also need to check the antenna connections. Loose or improper antenna connections can significantly affect the jamming performance. Make sure that all the antennas are firmly attached and that there are no visible damages to the antenna cables or connectors.
During this stage, we can also test the user interface of the jammer. If it has a control panel or a remote control, we should check if all the buttons and functions are working as expected. For instance, we can try to switch between different frequency bands and adjust the output power levels (if applicable).
Range Testing
Range testing is one of the most important aspects of testing a portable drone jammer. The jamming range determines how far the jammer can effectively disrupt the operation of drones. To conduct range testing, we first need to set up a baseline. We can mark a starting point where the jammer is located and then fly a drone at a known distance from the jammer.
We start by flying the drone at a relatively short distance and gradually increase the distance while observing the drone's behavior. When the jammer is activated, we expect the drone to lose its connection with the controller and either hover in place, land automatically, or return to its home point. The maximum distance at which the jammer can still cause the drone to lose control is considered its effective jamming range.
It is important to repeat the range testing multiple times with different drones and under different environmental conditions. Factors such as weather, terrain, and the presence of obstacles can affect the jamming range. For example, in rainy or foggy weather, the jamming range may be reduced due to signal attenuation.
Frequency Band Testing
As mentioned earlier, most portable drone jammers can jam multiple frequency bands. To test the effectiveness of each frequency band, we need to use drones that rely on specific frequency bands for communication and control. For example, some drones use the 2.4GHz band for basic control and the 5.8GHz band for video transmission.
We can start by flying a drone that uses a single frequency band and then activate the jammer on that specific band. Observe if the drone loses its connection and control. Repeat this process for all the frequency bands that the jammer is designed to jam. This will help us ensure that the jammer can effectively disrupt the communication on each individual band.
In addition to single - band testing, we also need to test the jammer's performance when jamming multiple bands simultaneously. Some drones may use multiple frequency bands simultaneously for better reliability and performance. The jammer should be able to handle these complex scenarios and still disrupt the drone's operation.
Durability and Stability Testing
A portable drone jammer needs to be durable and stable, especially if it is intended for use in harsh environments. To test the durability, we can subject the jammer to various physical stresses. For example, we can perform vibration tests to simulate the movement during transportation. Place the jammer on a vibration table and set it to a certain frequency and amplitude for a specific period.
We can also conduct shock tests. Drop the jammer from a certain height onto a soft surface multiple times to check if it can withstand minor impacts without damage. Additionally, we need to test the jammer's performance under different temperature and humidity conditions. Place the jammer in a climate - controlled chamber and expose it to extreme temperatures (both high and low) and humidity levels. Observe if the jammer continues to function properly under these challenging conditions.
Safety Testing
Safety is of utmost importance when testing a portable drone jammer. First, we need to ensure that the jammer does not pose any electrical hazards. Check for any signs of electrical leakage, overheating, or short - circuits. We can use electrical testing equipment to measure the electrical parameters of the jammer, such as voltage, current, and resistance.
The jammer should also comply with relevant safety standards and regulations. For example, it should not emit excessive electromagnetic radiation that could be harmful to humans or other electronic devices. We can use electromagnetic field meters to measure the radiation levels around the jammer during operation.
During testing, we also need to take safety precautions to protect the operators and the surrounding environment. Make sure that all the operators are wearing appropriate protective gear, and there are clear safety procedures in place in case of any emergencies.

Conclusion
Testing a portable drone jammer is a multi - step process that requires careful planning and attention to detail. By conducting comprehensive tests on functionality, range, frequency bands, durability, stability, and safety, we can ensure that our portable drone jammers meet the highest quality standards.
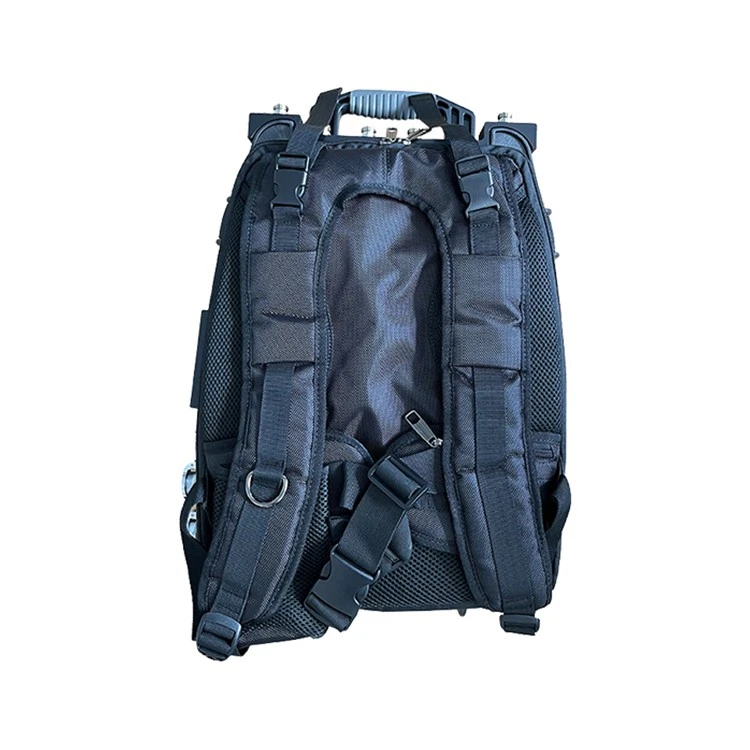
If you are interested in our Individual Soldier 8 Antenna Backpack Portable Anti Drone System FPV or other portable drone jammer products, we welcome you to contact us for more information and to discuss your specific requirements. We are committed to providing you with reliable and effective anti - drone solutions.
References
- International Electrotechnical Commission (IEC) standards on electromagnetic compatibility.
- Federal Communications Commission (FCC) regulations regarding radio frequency devices.
- Drone manufacturer's technical specifications for communication frequencies and protocols.